
Customize your website menu
Show or hide menu links, rename them in two languages, and add custom links and dropdowns.
Step-by-step instructions
- 01
Open Site Menu
Sign in to your Opei dashboard. Under Account in the left sidebar, select Site Menu.
- 02
Show or hide an existing link
Turn Show on or off for any row. Hidden rows stay in your editor, so you can restore them later.
- 03
Change the wording
Enter an English label and, if your site uses Chinese, a Chinese label. The site displays the matching label for each language; an empty Chinese label falls back to English.
- 04
Add a custom link
Select Add link. Enter a label and a site path such as /about, or a full https:// URL for an external page. Use the arrow buttons to change menu order.
- 05
Create a dropdown
On a parent row, select Add sub-link and enter the sub-link labels and URL. Add more sublinks as needed. The parent URL may be blank if it is only a dropdown heading.
- 06
Save and check your site
Select Save menu, then open your public website in English and Chinese. Your changes belong to your agent account and do not alter another agent’s site. Listing and map links still require IDX/VOW access.
Screenshots and callouts
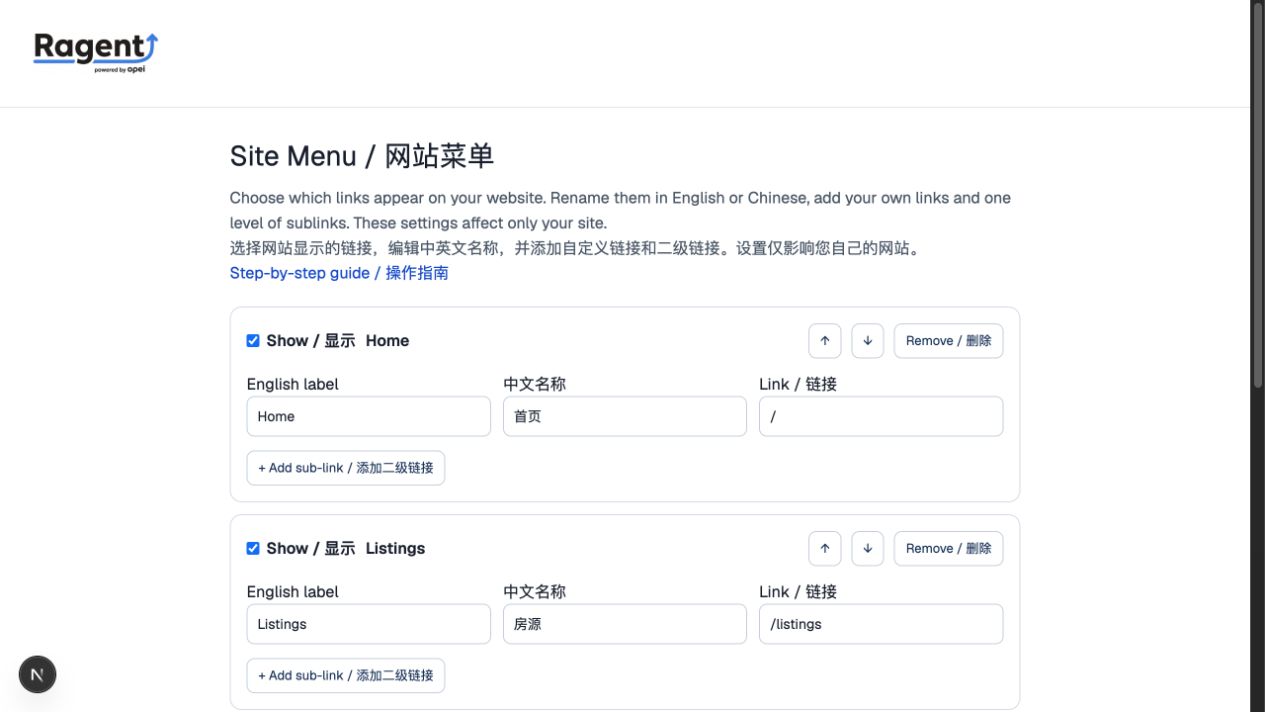 1 · Show or hide2 · English and Chinese labels
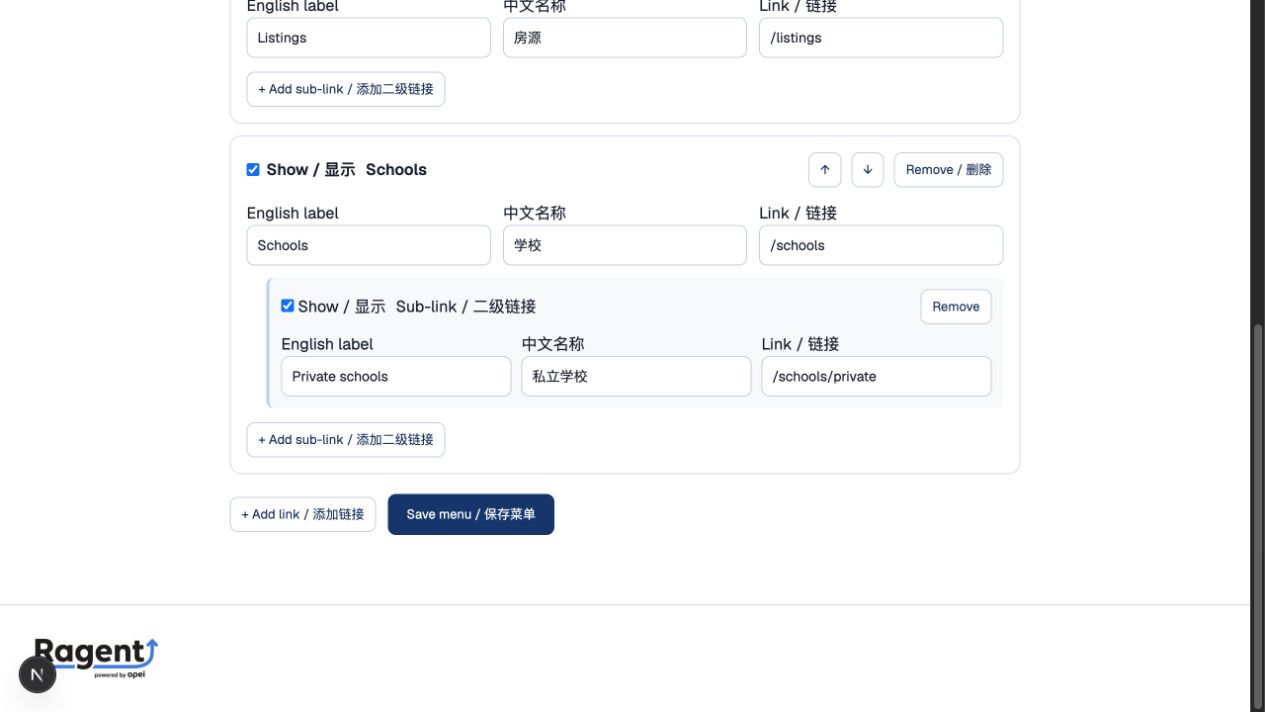 3 · Edit the sub-link4 · Add or save