
Connect a custom domain
Point a domain you own to your agent site and verify the connection.
Step-by-step instructions
- 01
Open Custom Domain
In the dashboard, open Account → Custom Domain. Enter the domain you own, such as www.example.com, without https:// or a page path.
- 02
Add the DNS record
At your DNS provider, add the record shown on this page. For www, use the displayed CNAME host and target. Root domains may require an ALIAS/ANAME record or a redirect to www; follow your provider’s available options.
- 03
Check and connect
Return to the dashboard and select Check connection. When verification succeeds, select Connect domain. DNS changes may take time to propagate, so retry the check later if it is still pending.
- 04
Confirm the live site
Open the domain over HTTPS and check the homepage, images and links. A new HTTPS certificate can take additional time after the domain connects.
Screenshots and callouts
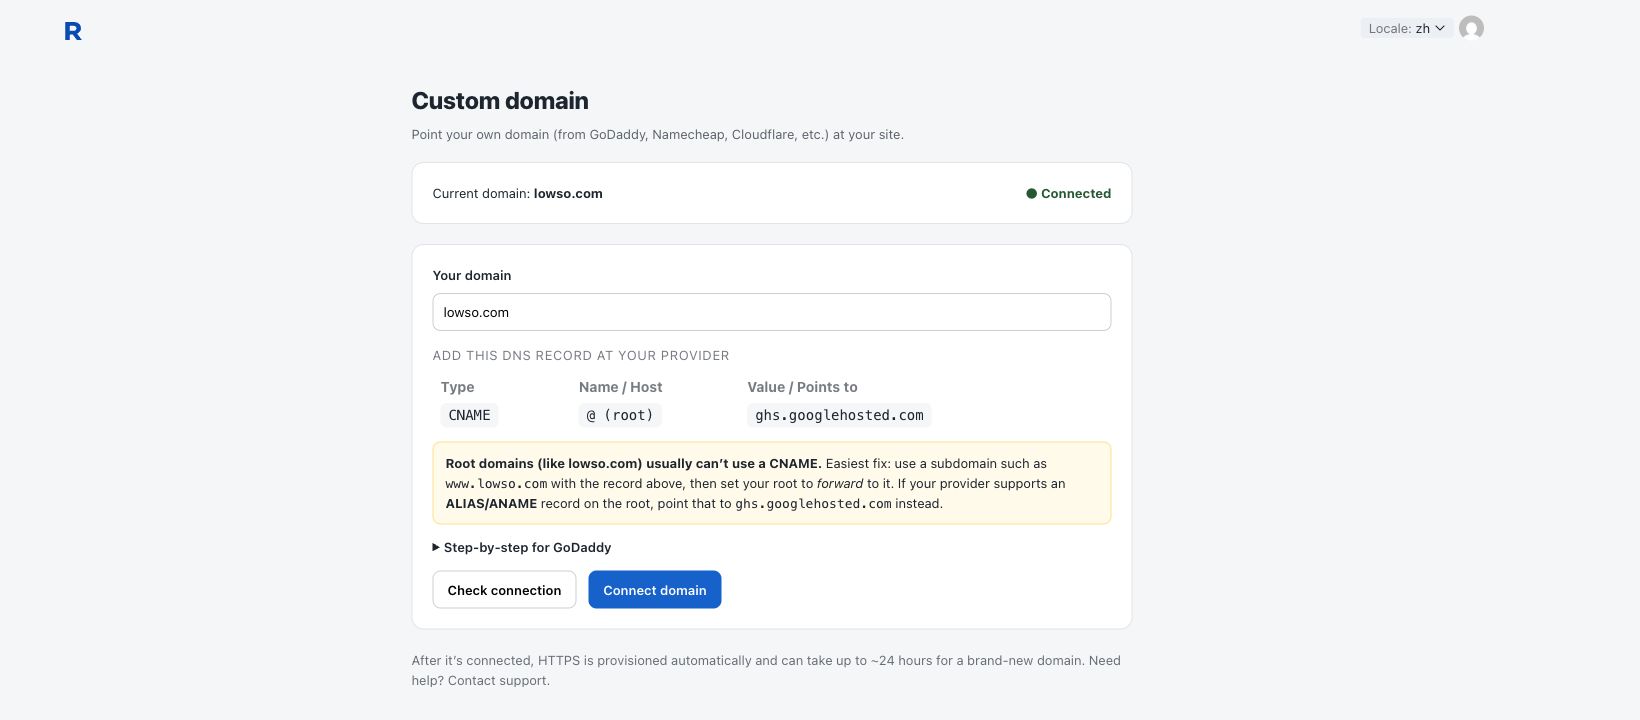 1 · Copy your DNS record2 · Check, then connect
Helpful notes
- Do not remove a working domain’s DNS records until the replacement site is ready.